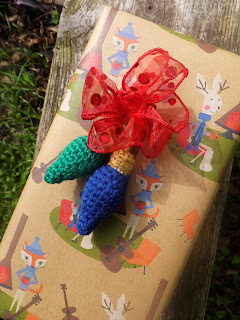
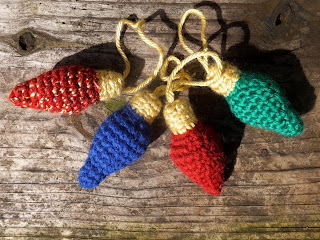
This is very likely my last blog post of year, so I'd like to go out with a bang, by which I mean a free pattern! It's a Christmas pattern, so yeah, very last minute, but it's so quick and easy you could whip one up on a short car ride to wherever you're spending your holiday. Almost any worsted weight yarn would work great and you need just a few yards to make your own Christmas Light Ornament.
Christmas Light Ornament
Materials
- Worsted weight yarn in at least two colors, Color A for the light portion and Color B for the top. My lights are made with Red Heart Super Saver in Ranch Red and Royal Blue, Red Heart Fiesta in Harvest, and Caron Simply Savor in Kelly Green. The tops are made with Caron Simply Soft in Autumn Maize.
- US G (4 mm) hook
- Tapestry or Large eye blunt needle
Notes
- Worked in a spiral; do not join rounds unless otherwise noted. Do not turn at ends of rounds.
- Repeat directions following * to end of round.
Abbreviations
sc: single crochet
sl: slipstitch
inc: increase (crochet two stitches in one space)
BLO: back loops only
Gauge
Not crucial for this project
Instructions
With Color A, work 4 sc in magic ring
1: *sc inc, sc (6)
2: *sc (6)
3: *sc inc, sc (9)
4: *sc inc, sc 2 (12)
5: *sc
6: *sc inc, sc 2 (16)
7-8: *sc
9: *sc dec, sc 2 (12)
10: *sc dec, sc. (8)
Sl to join. Tie off.
Stuff with poly fiberfill close to the top of the piece.
11: Join Color B in the back loop of any stitch of the last round. In BLO, *sc.
12-13: Sl to join in back loop of first st. In BLO, *sc.
Tie off, leaving a long tail to make a hanging loop for your ornament (6-8” should be enough).
Finishing
Pack stuffing up to the top of the ornament. Using a tapestry needle or large eye blunt needle, weave your yarn tail through the back loops of remaining stitches and pull tight to close. Weave back and forth a couple times to secure the yarn, ending in the center of the top of the light. Insert needle under a strand of yarn near where you’ve pulled up your yarn tail, pull it up until the loop looks about the right length for your ornament, and…tie a knot in it! I know, the horror. But don’t worry, just weave the yarn back under a few stitches to pull the knot underneath and out of sight and trim the tail, tucking the last bit of yarn inside the ornament.
I especially like little holiday projects like this as personal additions to gifts or cards, and they look nice on top of a prettily wrapped package. Adding a little something homemade makes a gift that much more special, even when you only had time for a mini-project like this one.
Or you can go ahead and hang it right on your tree!
Happy Holidays!


No comments:
Post a Comment