
These Candy Hearts are a lot of fun! The can be made into a bean bag, a tiny pillow or pincushion, or a sweet candy or other gift delivery device.
The pattern can be found below or downloaded for free from my Ravelry Pattern Store.
Candy Heart

Materials
- Worsted weight yarn of your choice. Shown in Red Heart Super Saver in Shocking Pink and White
- US G (4mm) hook
- Tapestry needle
- Stuffing materials—polyfill, dry beans, potpourri, or candy if you want your heart to be a gift pouch
Notes
- Worked in rounds. Do not turn at the end of any round.
- Starting chains do not count as the first stitch of
- Repeat directions following * to end of round.
Gauge
Gauge is not crucial in this project, but you do want tight
stitches to hide stuffing. My gauge is approximately 5 sts and 5 rows to 1 inch
in single crochet. The finished heart measures 3.75” x 3.5” x 1”
Abbreviations
st : stitch
ch: chain
sc: single crochet
hdc: half-double crochet
sl: slipstitch
dec: decrease (crochet
two stitches together)
inc: increase (crochet
two stitches in one space)
Pattern
Bottom Heart
1: Sc 6 in magic ring. Sl to join.
2: Ch 1, *sc inc. Sl to join. (12)
3: Ch 1, *sc, sc inc. Sl to join. (18)
4: Ch 1, *sc 2, sc inc. Sl to join. (24)
5:
Ch 1, sc inc, 3 hdc in next, sc inc, sc 5, sc inc, 3 hdc in next, sc inc, sc 6,
3 sc in next, sc 6. Sl to join. (34)
6:
Ch 1, sc inc, (hdc, hdc inc) x 3, hdc, sl 3, (hdc, hdc inc) x 3, hdc, sc inc,
sc 7, 3 hdc in next, sc 7. Sl to join. (44)
7:
Ch 1, (hdc, hdc inc) x 5, hdc, sc, sl 3, sc, (hdc, hdc inc) x 5, hdc, sc 8, 3
hdc in next, sc 8. Sl to join. Sl again in back loop of same st. (56)
8:
Ch 1. In back loops only, sc 2, (sc dec, sc 5) x 2, sc dec, sc, (sc dec, sc 5)
x 3, sc 4, (sc dec, sc) x 2, sc 6. Sl to join. (48)
9-10: Ch 1, *sc. Sl to join. Tie off. Weave in Ends.

Top Heart
Repeat rounds 1-7 of directions for bottom heart, excepting
final sl in back loop of st. Tie off, leaving along tail to sew the two halves
together.
Embroidery
There are a couple ways to do this. The “I ♥ U” version is
done with a tapestry needle and a contrasting color of worsted weight yarn,
using stem stitch to shape the letters. This results in clearer but slimmer
lettering, though it could be thickened by using a larger gauge yarn.
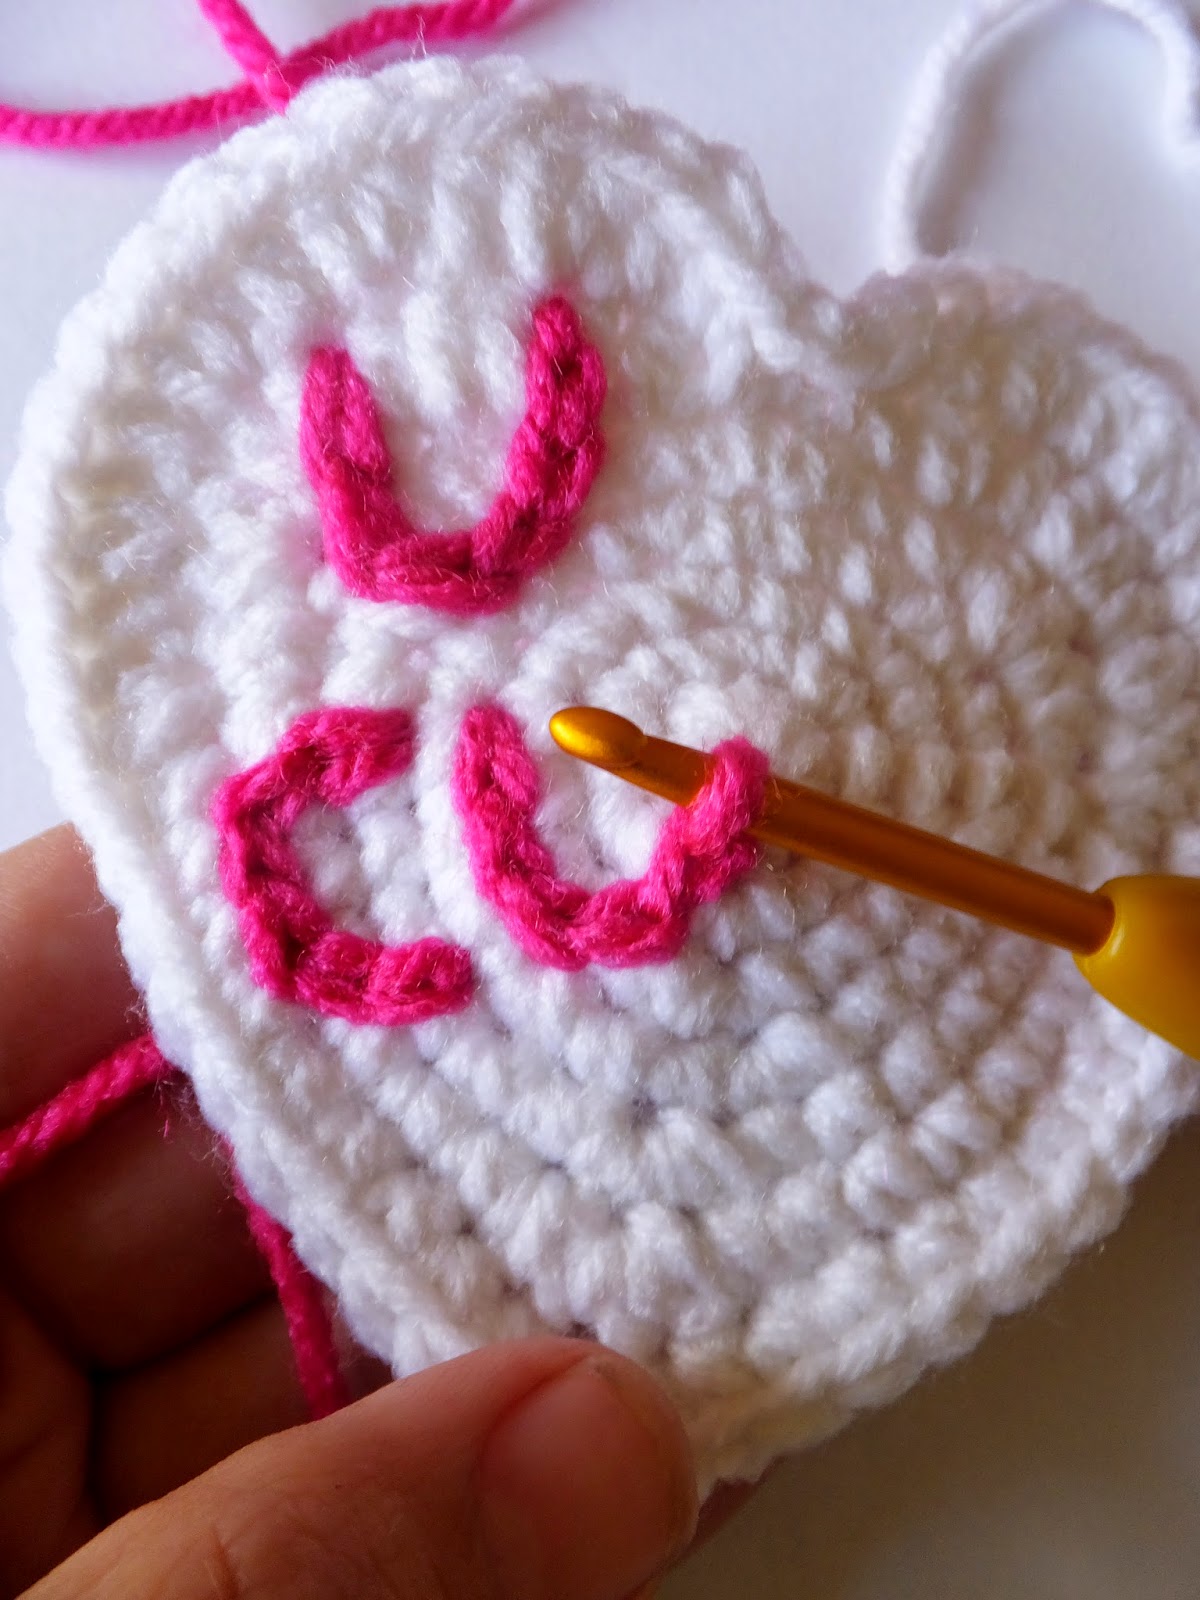
The “U R CUTE” version is done with chain stitch or crochet
embroidery. Results will be similar using either method. I used crochet
embroidery, with contrasting worsted weight yarn and my same G hook.
Numerous tutorials are available online for each of these
methods, so I will only give a brief explanation of the one I found worked
best: crochet embroidery.
Starting with a couple feet of yarn (any more becomes
unwieldy in my opinion). Draw up a loop wherever you’d like your first letter
to begin. In the nearest open space between stitches, draw up another loop, and
continue shaping your letters in this manner. At the end of each letter, or for
sharp turns needed for letters like “T” and “E”, pull the yarn end up to the
front, and then back through to the back. Then you can carry the yarn across
the back to start the next letter.


Finishing
The finishing is a bit tricky. To start sewing the pieces
together, find the center stitch of each heart—the point where the two top
halves meet. For the top heart, there will be 18 stitches between this stitch
and the end of the last round, where your sewing yarn begins. Because the
bottom heart includes some extra decreases, you want to start sewing only 15
stitches from the center of the bottom heart. Using a tapestry or large eye
blunt needle, whipstitch by inserting the needle under the outermost, or back,
loop of the top heart and both loops of the bottom heart. To make up for the
extra stitches, sew two stitches together whenever you see a corresponding
decrease on round 8 of the bottom heart. These don’t have to match up exactly,
but you want to get fairly close.
 | |
| sew through both loops of bottom heart |
 |
| back loops of top heart |
 |
| and through two back loops of top heart for decreases |
Leave the last 5 or 6 stitches open at the end for stuffing.
I like to stuff with dry beans or popcorn, which give the heart some weight and
make it fun to squish. Using rice or another small grain as stuffing makes a great pin cushion, as does packing
tightly with polyfill. You could also use polyfill for a tiny pillow, or
potpourri for a sweet-smelling sachet. Once your heart is stuffed, finish off
the last stitches and weave in your ends. If you’d like to use your candy heart
as a candy delivery system, tie off with the last stitches left open and stuff
with treats!


No comments:
Post a Comment