Showing posts with label irish. Show all posts

Tuesday, March 10, 2015

Irish Flag Koozie

As promised, a brand new pattern using the shamrock embellishment I wrote about recently. A drink koozie that declares your Irish heritage—whether you celebrate it all year round or just vicariously on St. Paddy’s Day. The stripes mimic the colors of the Irish flag, and of course there is the necessary shamrock for good luck. Best of all, it's FREE!!!

The pattern is also available as a pdf download from my Ravelry Store and as a finished item in my Etsy shop: Irish flag koozie

Onto the pattern.


Irish Flag Koozie

Materials
  • Worsted weight yarn of your choice in green, white, and orange. Lighter green worsted yarn for shamrock. Koozie pictured is made with Lion Brand Vanna’s Choice in Kelly Green, White, and Terra Cotta. Shamrock is made with Caron Simply Soft in Limelight
  • US H (5 mm) hook, or size needed to obtain gauge
  • Tapestry or Large eye blunt needle
  • Sewing pins    

Notes
  • Turning chains do not count as the first stitch of rows.
  • Repeat directions following * to end of round.

Abbreviations
st : stitch
ch: chain
hdc: half-double crochet
tc: treble crochet
sl: slipstitch
inc: increase (crochet two stitches in one space)

Gauge
14 sts and 11 rows = 4 inches in hdc

Koozie

1:  With Kelly Green, hdc 8 in a magic ring. Sl to join this and all succeeding rounds. Do not turn.  (8)
2:  Ch 1, *hdc inc.  (16)
3:  Ch 1, *hdc, hdc inc.  (24)
4:  Ch 1, *hdc 5, hdc inc.  (28)
5-8:  Ch 1, *hdc.
9-12: With White, Ch 1, *hdc.
13-15: With Terra Cotta, Ch 1, *hdc.
16: Ch 1, *sc. Tie off. Weave in ends.


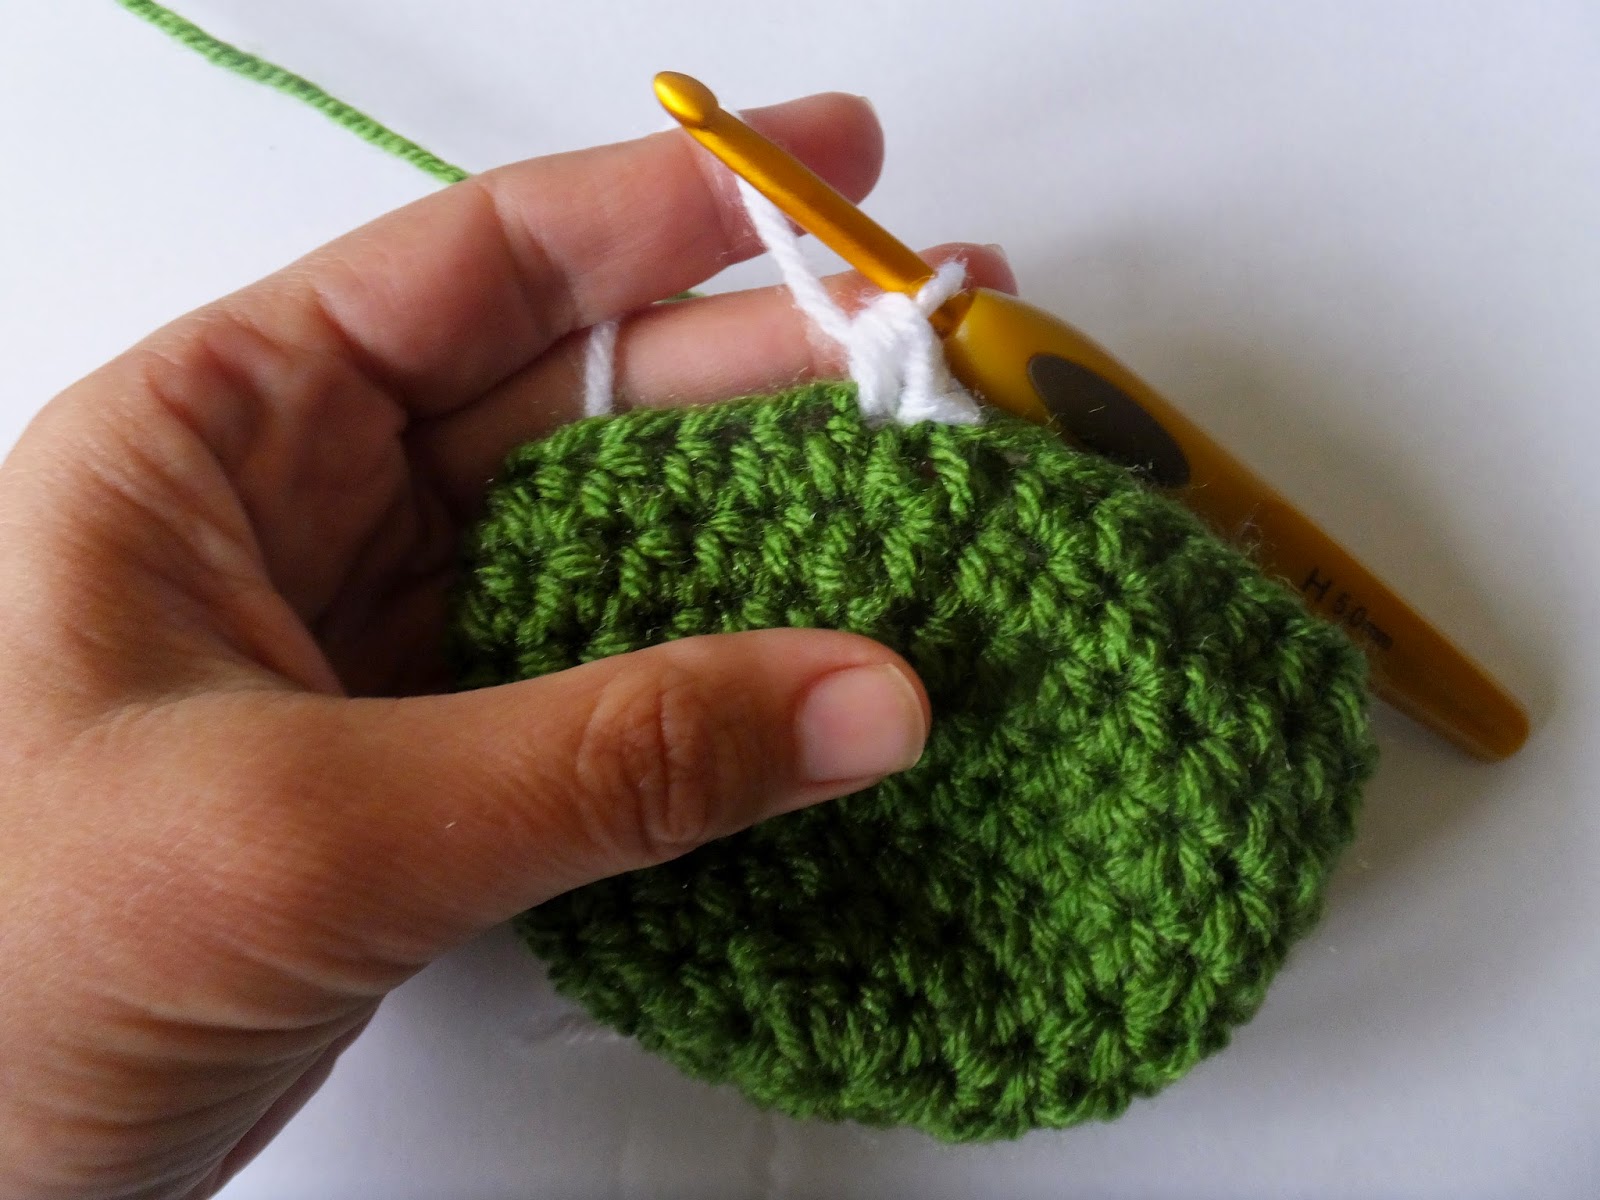
Note:  When changing colors, switch yarns in the last yarn over of the last dc of the previous round. This makes for the most seamless transition.

In the last yarn over of the last green stitch, pull up a loop of white.

Sl to join, and continue with white.


Shamrock
With Limelight, working into a magic ring, Ch 3, tc, hdc, tc, ch 3, sl back into ring. Repeat 2 more times. Pull ring tight. For stem, ch 5, sl in second ch from hook and remaining chains. Tie off, leaving long tail (+/- 15”) to sew to koozie.


Finishing
Pin the shamrock into place in the desired position. I center mine opposite of the seam in the white section, with just the edges coming out into the other colors. Stitch around the edge of the shamrock, catching the yarn just under the shamrock edge. Tie off and weave in ends.


You're done! Time to celebrate!


Thursday, March 5, 2015

Shamrocks and Clovers

In my last post, I shared the pattern for my  Lucky Clover Headband, which includes directions for how to make small three- and four-leaf clovers. This week I'm in the process of putting together a new, super secret (for now) St. Paddy's Day project which will have a shamrock embellishment rather than clovers. So, what's the difference?

The truth is "botanists don't agree on the exact species" and "Irish literature makes no distinction" so I think it's fair to generalize that a shamrock is a type of clover that has three heart-shaped leaves rather than three or four rounded ones and leave it at that.


Shamrock
Clover


For the pattern I'm working on, I wanted more of a traditional Irish shamrock, so I needed to make a slight change to my clover design to get that distinctive shape.

 Here's the pattern for my clover embellishment:

Clover

 1: In a magic loop, ch 3, tc 2, ch 3, sl back into loop
    Repeat 2-3 more times, for 3 or 4 leaf clover
2: Ch 5-7 (depending how long you want the stem). Sl in second ch from hook, and each succeeding ch. Tie off, leaving long tail if it will be used as an applique. Pull magic loop tight and weave in end. 
 
And the finished product: 
 
Look at all that luck
To make the leaves more heart-shaped and shamrocky, I simply added an hdc between the two tc stitches in each leaf.

Shamrock
1: In a magic loop, ch 3, tc, hdc, tc, ch 3, sl back into loop
    Repeat 2 more times.
2: Ch 5-7 (depending how long you want the stem). Sl in second ch from hook, and each succeeding ch. Tie off, leaving long tail if it will be used as an applique. Pull magic loop tight and weave in end.


Ta Daa!


Shamrocks or clovers could be used to embellish any number of items or backed with felt and made into a pin. I'll show you what I've done with mine some time before St. Paddy's!


Thursday, February 26, 2015

Lucky Clover Headband

I think I've finally recovered from Mardi Gras, which means it must be time to start thinking about St. Patrick's Day! For those in cooler climes, this Lucky Clover ear warmer is just the thing to keep you cozy and save you from possible pinchings.


What I love about this headband is the fun of having a field of clovers in your hair
but only one of the lucky four-leaf variety. It's up to you where you want to place your lucky clover. No two headbands will be exactly alike. You could even go crazy and make them all lucky if you're feeling especially decadent with your luck.

I'm offering this pattern for free here on the blog and as a Ravelry download. In addition, the pattern will be available as a Crochet Kit from my Etsy store, including a color printout of the pattern and all the yarn you need to make your own headband (plus a few extra yards). Kits are $5, less than buying full skeins of the yarn would cost, and they'll come right to your door.

Okay, enough shameless self-promotion. Onto the pattern!


Lucky Clover Headband

Materials

  • Worsted weight yarn of your choice in two colors. Headbands shown in Lion Brand Wool-Ease in Wheat and Forest Green Heather. Clovers shows in Caron Simply Soft in Dark Sage and Limelight.
  • US H (5 mm) hook, or size needed to obtain gauge
  • Tapestry or Large eye blunt needle
  • Sewing pins    


Notes

  • Turning chains do not count as the first stitch of rows.
  • Repeat directions following * to end of row.

Abbreviations
st : stitch
ch: chain
hdc: half-double crochet
tc: treble crochet
sl: slipstitch
dec: decrease (crochet two stitches together)
inc: increase (crochet two stitches in one space)

Gauge
14 sts and 11 rows = 4 inches in hdc
Finished measurements are 3.25” wide with a bottom width of 1.5” Length is approximately 17” for child size, and is recommended for heads 18-20.5” Adult size is approximately 19” long and is recommended for heads 20.5-23”.  A narrower 2.5” headband can be made by eliminating the last increase and first decrease rows.

Headband


Ch 6
Increase rows:
1:  Hdc in second ch from hook, and in remaining chs. Ch 1, turn.  (5)
2:  *Hdc. Ch 1, turn.
3:  Hdc inc, hdc 3, hdc inc. Ch 1, turn.  (7)
4:  *Hdc. Ch 1, turn.
5:  Hdc inc, hdc 5, hdc inc. Ch 1, turn.  (9)
6:  *Hdc. Ch 1, turn.
7:  Hdc inc, hdc 7, hdc inc. Ch 1, turn.  (11)

Work even until piece measures 14.5” for child size or 16.5” for adult size.

Decrease rows:
1:  Hdc dec, hdc 7, hdc dec. Ch 1, turn.  (9)
2:  *Hdc. Ch 1, turn.
3:  Hdc dec, hdc 5, hdc dec. Ch 1, turn.  (7)
4:  *Hdc. Ch 1, turn.
5:  Hdc dec, hdc 3, hdc dec. Ch 1, turn.  (5)
6:  *Hdc. Ch 1, turn.
7:  *Hdc. Tie off, leaving long tail to sew ends together.


Clovers

Make 3 three-leaf and 1 four-leaf.
 1: In a magic loop, ch 3, tc 2, ch 3, sl back into loop
    Repeat 2-3 more times, for 3 or 4 leaf clover
2: Ch 5-7 (depending how long you want the stem). Sl in second ch from hook, and each succeeding ch. Tie off, leaving long tail (+/- 15”) to sew to headband.  Pull magic loop tight and weave in end.


Headbands pictured below have the following stem lengths:
1: 4-leaf clover with 7 ch stem
1:  3-leaf with 6 ch stem
2: 3-leaf with 5 ch stems


Finishing
With headband lying flat, pin clovers in desired position. Note that clovers will appear further apart when the item is worn. Stitch around outer edges of clovers, catching the yarn just underneath the edge so stitches are invisible. If desired, you can leave the stems loose so they will stick up slightly from the headband for a 3-D effect. Weave in Ends.
Whipstitch two ends of headband together to join. Weave in ends.

You’re done! Celebrate St. Patrick’s Day in Style!